 Miss Havisham’s Victorian Tea (Chapter Eight in Pavlova in a Hat Box, Sweet Memories & Desserts) was originally posted on my old blog on May 24, 2012
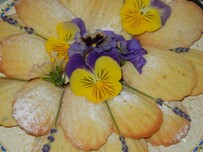
Why did I name my tea catering business, Miss Havisham’s Victorian Tea Caterers? It was a capricious and lighthearted decision, based on my simple delight in the novel, Great Expectations. Although there is not much to like about Miss Havisham, I feel her pain, for she is the epitome of every woman who has been bruised and embittered by romantic love. Nearly every woman has stopped her clock at least once in her life. When love disappears, she leaves dirty dishes in the sink, refuses to bathe, and sleeps in her clothes. These are not women who were merely stood up for a dinner date, but women who have felt Shakespeare’s passionate words, “I love you more than words can wield the matter, Dearer than eyesight, space and liberty.” Poor Miss Havisham! Perhaps if she had married her Compeyson, in ten years she might have made her clocks go faster, for women in Victorian times, even wealthy ones, were not always content. How many of us have dark mourning rooms locked inside our lives? Perhaps not from lost love, nor anything too severe, but even a tiny closet full of cobwebbed tangles of unresolved memories can create intermittent paroxysms, getting us in touch with our Miss Havisham feminine sides. Certainly there are unreasonable bursts of “You go, girl!” to a friend who is contemplating revenge on someone who did her wrong. Misery loves company and we hardly recognize Miss Havisham when she visits for tea in her tattered wedding dress, enticing us to pamper and powder our wounds and sharpen our claws. How easy it is to love a chat with Miss Havisham, for surely she was wronged, and surely there have been injustices wrought against us. The illustrious Charles Dickens writes of Miss Havisham, “But that, in shutting out the light of day, she had shut out infinitely more; that, in seclusion, she had secluded herself from a thousand natural healing influences; that, her mind, brooding solitary, had grown diseased, as all minds do and must and will that reverse the appointed order of their Maker.” We know that in the novel, the vengeful Miss Havisham finds redemption for her soul when she begs for Pip to forgive her, although her physical end is imminent. I like happy endings and although she perishes in a fire, the large room of her heart has been cleansed and the curtains have been opened to allow for the light of love in. It is no news that we, too, will die in the end, but let not the casket of bitterness and hurt also be interred with us. I once had a tea business called Miss Havisham’s Victorian Teas and my purpose was to create a sensory experience with celebratory food, flowers, china, poetry, and music. With an eclectic arrangement of china cups and plates, antique hats, and special recipes, I created teas for every occasion, i.e. birthday, anniversary, and wedding. Sometimes, a tea was created for women to come together for no reason at all, except to affirm and encourage one another, and to clean out the forgotten rooms in our lives. I wanted my tea business to possess the spirit of Miss Havisham’s redemption, which was the forgiveness that was birthed within her before her death. I will entice you with one recipe from my tea business that is best served with the laughter and honesty of women friends. It’s Spring and time to air the closed rooms of our hearts to make room for new love, wildness, and healing. Clarissa Pinkola Estes writes in Women Who Run With the Wolves, “If there is to be change, we are it. We carry La Que Sabe, the One Who Knows. If there is to be inner change, individual women must do it. If there is to be world change, we women have our own way of helping to achieve it. Wild Woman whispers the words and the ways to us, and we follow.” Gather together in beauty and share this luscious, and perhaps magical, recipe in the forgiving spirit of Miss Havisham. Lemon Lavender Madeleines (recipe on page 34 of Pavlova in a Hat Box, Sweet Memories & Desserts) There is a special madeleine pan sold at cookware stores. Generously brush with melted butter and a dusting of flour to prevent sticking; or spray thoroughly with non-stick cooking spray and dust with flour. Ingredients: 2 large eggs 2/3 cup granulated sugar 2 tsp. lemon juice (fresh squeezed, if possible) zest of one lemon a pinch of salt 10 Tbs. unsalted organic butter, melted and cooled slightly 1 cup all-purpose flour 1 ¼ tsp. crushed fresh unsprayed lavender flowers; additional unsprayed lavender flowers or other flowers for decorating Confectioner’s sugar for dusting Directions: 1. Beat eggs and 2/3 cup sugar until pale and thickened; add lemon juice, peel, melted butter, and salt. 2. Crush lavender flowers between fingers and add to batter; add flour and with a spatula fold into the egg mixture until blended. Do not over mix and let stand fifteen minutes. 3. Pour batter into pans, filling ¾ full. Bake, rotating halfway through, until edges are crisp and golden, 8 minutes. Let madeleines cool slightly in pans on wire racks. Invert, unmold, and place on a china plate and decorate with sprigs of lavender or unsprayed flowers. Dust lightly with Confectioner’s sugar. If made with a gentle touch, these cakes turn out delicately and have a light custardy taste.
0 Comments
Norah’s Dancing Dream Scones (Chapter Thirteen in Pavlova in a Hat Box, Sweet Memories & Desserts) was previously posted on my old blog on Dec. 6, 2010.
John B. Keane, the prolific Irish writer of plays and novels (now deceased), wrote a short story, ‘Spreading Joy and Jam at Christmas,’ that is from his collection titled, ‘Irish Stories For Christmas.’ One man tells the story of how he and his friend traveled to Mayo at Christmastime to visit old schoolmates. His friend is jovial, lighthearted, and he is a master at role playing. They arrive in the village, Claremorris, and stop at a hostelry. Outside the door, they see a large van full of jam. There are pots of raspberry, strawberry, plum, gooseberry, marmalade, and mixed fruit. The teller of the tale writes, “It’s a terror,” said my friend, “to see so much jam exposed to the naked eye and half the world starving.” As the two men sit at the bar enjoying some whiskey, a young girl walks in and mistakes the friend for the driver of the jam van. She asks if she can have a pot of jam and the friend replies that if she has the means of transporting, she could load a few crates of the jam…”but not to overdo it. Ye don’t want to make pigs of yeerselves entirely.” The men leave the pub and cheerfully walk through town encountering others who are in need of words of wisdom. Later, a cart passes them carrying two women beaming with happiness because they have two cases of jam. The young girl waves at the men ecstatically and the friend says, “Were we to depart life now we would surely see heaven for the happiness we spread this day.” I’ve just started my cookie baking marathon, including a new scone recipe made with marmalade that I brought to a recent Christmas ceili. Each year, I bake up to fifteen varieties of cookies and give them as gifts. The manager at a local farm store where I buy my greenery said to me last week, “It’s really Christmas when Cynthia brings us a plate of cookies.” I have a reputation of par excellence for my pastries, and I am not modest about saying so. Each year, I buy good quality ingredients that include eggs from the local farm, as well as a lot of organic items. There’s no doubt that I spend a lot of money to make these superior cookies that I bless with my hands as I mix, roll, and form. I don’t budget well, I spend too much, and I feel a bit like the character in John B. Keane’s short story. In a way, I am role playing, too; intoxicated with the intensity of this sensory season and giddy with giving melt-in-your mouth cookies. Last year, after baking a batch of macadamia nut cookies with dried pineapple, I noticed that the band aid on my finger was missing. Oh my! So, I only gave this particular cookie to a few friends, and gave the instructions to cut up in small pieces before eating. I am very careful when I bake – apron on, cats cast out of the kitchen, hair pulled back, finger nails are clipped and no open sores! As I remember the comical incident of last year, I seriously hope this year my cookies can in some small way bandage seasonal stress, memory of loss, and the ache we carry for those who do not have bread, let alone cookies. Norah in my novel, The Irish Dresser, A Story of Hope during The Great Hunger, is sincere, but foolish, when she steals the Captain’s food and attempts to feed the sick and dying in the hold of the ship, ‘The Star.’ There are Robin Hoods in all of us, our idealism and sense of justice fueling light-hearted, clandestine, and even illegal activity. I’m not advocating stealing, but I am challenging myself and others to give magic away – in cookies, donations, volunteerism, and activism. And if we have to be full of blarney like the character in John B. Keane’s story sometimes, so be it. We should all live with this mindset: “Were we to depart life now we would surely see heaven for the happiness we spread this day.” Norah’s Dancing Scones Ingredients: 2 1/4 cups unbleached all-purpose flour (wee bit more for handling) ¼ cup brown sugar, or less (jam makes it sweet enough) 2 tsp. baking powder ½ tsp. baking soda ½ tsp. salt 1 stick cold unsalted butter ½ cup buttermilk 2 medium eggs 1 tsp. vanilla zest of an orange a few drops of orange juice ¾ to 1 cup cup marmalade melted butter sanding sugar (coarse sugar) Directions: 1) Set oven at 375 degrees; line parchment paper on cookie trays; mix dry ingredients into a large bowl; cut butter into small pieces and add to dry mixture; mix with pastry cutter (I couldn’t bake without this gadget) or use fingers to break up into small pea-sized pieces; butter should remain solid. 2) In a small bowl, whisk together buttermilk, eggs, orange zest and drops thoroughly; add to dry mixture and barely combine. 3) On a well-floured surface, divide dough into two pieces (if sticky, add a little flour, but not too much); don’t knead, but gently pat into two disks about ¾ inch thick and 7 inches in diameter (give and take). 4) Spread marmalade or jam over one disk (leave ½ inch around edge of disc) and top with other disc, pinching sides and pressing down; brush with melted butter and sprinkle with sugar; use a sharp knife to slice circle into 8 triangular wedges on baking sheet, leaving some space between them; chill until firm (20 min.). 5) Bake for 20 to 25 minutes, rotating sheets halfway; scones should be golden and it’s fine to have some bubbling marmalade peeking out. Stirring up Stories in the Kitchen (Chapter Two in Pavlova in a Hat Box, Sweet Memories & Desserts). Was posted on my old WordPress blog on Oct. 3, 2010.
Cloister. I like to say the word aloud and dream about a sanctuary in autumn; a simple white walled room with an ample window for sunbeams to pour in so thick, dust particles form into tiny fairies that slide down the beams. The only sound I hear is birdsong, wind song, or ocean song. A writer requires this kind of room to be shut away in, sheltered, and quieted; a place to withdraw from the world to create new worlds with words and storytelling. “A woman must have money and a room of her own if she is to write fiction,” Virginia Woolf said. Yes, please! I can imagine a sequestered luminous and peaceful writing room, but in reality, I have never had one. I can also picture myself in one of the private writing rooms at the New York City Public Library, or perhaps squirreled away in a cozy cottage at The McDowell Colony where one fortunate artist described the person delivering his picnic lunch basket as the Angel Gabriel. Oh, the freedom to create in uninterrupted time! I yearn for unadorned and easy days to meander deep down into the abyss of the past and dig out story relics to restore to some original shine. I pour over Poets & Writers’ magazine’s conferences and residencies section and dream of a studio in a rustic medieval village in Italy, or being on an idyllic Greek Island only accessible by boat. I especially like the Brittany writer’s rental with the setting in a 19th century stone house with five fireplaces and only a few miles from ocean beaches. I dream of these places, but I have never had my own special writing room. I have always written stories in the sundry places available to me. The office, bedroom, parlor, living room, dining room, kitchen, public libraries, bookstores, diners, cafes, bed and breakfast inns, beaches, cars, buses, trains, airplanes, the back porch, friends’ homes, hotels, and even in the woods. I know there must be more rooms where I have taken my yellow legal pad or lap top and then put one word in front of the other. Sometimes choosing a room to write in reminds me of putting one feeble step in front of the other, like after I had major surgery and was forced to walk the next day. Alas, I have learned to write without the one unique charming room of my own. I’ve learned to capture my undisciplined mind that flits and flies around ideas and worries, and cage it temporarily so I can hear it sing a story to me. When words aren’t hunted, honed, and placed on a page, I can write in my mind and heart. Ideas and outlines for stories form when I am showering, walking, cleaning, exercising, baking, and working on a painting in art class. I also write when I dance, the music infusing my brain with visions of grandeur. It happened that the entire premise for my first children’s book came to me while I was Irish set dancing in a pub. Writing for me can’t be condensed into one small room with a shot of light, but if it comes that way, like a much needed vacation to the tropics, I take it and splurge. Mostly, my writing experience isn’t like the narcissus bulbs forced to grow in January. I do require time for the right light for the right story, whether in my head, home, or a public place. But a favorite room to write in is when I am in my kitchen and my hands are stirring, kneading, and molding. I call this writing love play writing because it can be a prelude to a story, acted out in measuring cups and spoons. It is the preferred room for when I write without my laptop or legal pad. The act of baking is full of unique and often simple ingredients with the potential for something delectable to be shared with others. Likewise, fiction writing is full of characters coming together in plot and suspense, culminating into a story that satisfies the hunger of readers. Story ideas, chapter scenes, plots, and endings often form and rise in my head while I mix, shape, and bake scones, breads, and pies. I can create magic in the kitchen because in no time at all, I whip up a pie, a cake, or cookies. And while doing so, I’m spicing up my writing already mixed up on a page or two, or even concocting ideas for a new story. Unlike baking however, I am unable to whisk up good writing quickly, no matter how many ideas or epiphanies come my way in the kitchen or elsewhere. Writing requires plenty of time for characters and scenes to baste, simmer, cook, boil, bake, and sometimes even chill, before it can be partaken of in a digestible, flavorsome, and entertaining story. But when I go to my kitchen to bake, I can create and complete something tangible and scrumptious to share with others in an hour or so. There is immediate gratification and success in baking, unlike writing done in many rooms day after day, week after week, and year after year (and sometimes without success). Becoming a seasoned and palatable writer is a slow cooker process. The outcome, if all the ingredients work, can be delicious. Yes, Virginia Woolf, I suppose I do have a favorite room of my own to create fiction in. It is in my kitchen where I face the empty pages of the stories in my head and fill the empty tins, pans, and cookie sheets with scrumptious possibility. Chocolate Cream Cheese Cupcakes Ingredients: Batter: 3 cups flour 1 tsp. salt ¾ cup cocoa 2 tsp. baking soda 1 cup sugar 1 tsp. cinnamon 2 cup water ¾ cup oil 2 Tbs. vinegar 2 tsp. vanilla Filling: 1 large egg ¼ cup sugar ¼ tsp. salt 8 oz. cream cheese ½ tsp. vanilla 1 ½ cups chocolate chips (more or less, according to your liking) Directions: Mix dry ingredients in a large bowl; mix water, oil, vinegar, and vanilla; add to dry ingredients and beat with an electric mixer until smooth; fill cupcake holders 1/2 full with batter and add a heaping Tbs. of filling in center. Bake 350 degrees for approximately 40 to 45 minutes. Let cool on rack and then wrap them up in whimsical cupcake wrappers found in specialty stores (I order special cupcake wrappers online from Fancy Flours). No frosting is needed, for this would make the cupcake too sweet, but sprinkle with confectionary sugar and add sprigs of preferred washed, no spray, flowers. Arrange the cupcakes on a cake platter and drape with a few pieces of ribbon. Sometimes I double the recipe and arrange them fancifully on three cake plates set atop one another. 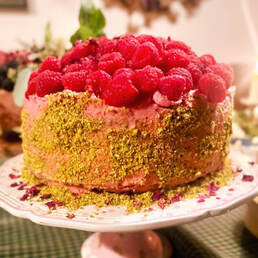 Christmas Cookies and Irish Ceili Cakes - December/January 2022/2024
For nearly thirty years, right after Thanksgiving, my cookie baking marathon (and cake planning) begins with enthusiasm and joyful frenzy. I go through my Christmas cookie and cake files and pick out some of my tried and true recipes and make a list. And then I sit in a Barnes & Noble bookstore and flip through magazines to find new recipes to add to the list. I also go to Pinterest and get inspired by photos and recipes. I have tattered, brown, and stained vintage cookbooks that I wander through. And I revisit my old Martha Stewart Living magazine issues for December and pull out a few recipes. November is the beginning of hunting season in the northeast of the United States and it is also hunting season for the seasoned confectioner. I’m determined to find new cynsational cookie and cake recipes to impress and dazzle my friends, neighbors, and Irish dancers who attend our New Year’s Day Ceili (Irish music, dancing, and storytelling event) we host each year. The world may seem to be going to hell in a handbasket, but when I sit down to write my Christmas cookie and cake list, full of thanksgiving, I am suddenly aware that no matter how dismal life can get, creating sweetness with wholesome ingredients for others is joyful magic. It isn’t a burden, except when I want to make too many recipes in a day. I am the Celtic Cookie and Cake Queen conducting kitchen alchemy that transforms simple ingredients into delightful deliciousness. It is the one time of the year when I feel as Robert Browning, who wrote, “God’s in his Heaven/All’s right with the world.” This line is from Songs From Pippa Passes and is about a young, innocent girl wandering through town singing kindness and virtue to the people she encounters (or passes). There are various interpretations, and for me, I become Pippa at Christmastime creating and gifting others with my baked delectables. And when it is over, the spirit of this holiday sprinkles over the year, like fairy dust and confectionary dusting, as I continue to bake for any occasion, and even for no occasion. The following recipes are ones I have used the past few years and are favorites of mine: Jam Gems is a buttery cookie recipe that is one of my tried and true recipes and one of the seventeen varieties I made this year for the holidays. This recipe, of course, can be made any time of the year and is a luscious way to use up the half empty jam jars in your fridge. Jam Gems Ingredients ¼ cup granulated sugar Pinch of salt 1 ½ cups (3 sticks) unsalted butter, softened (I use organic and oftentimes substitute Miyoko’s alternative butter for half of the butter amount) 2 eggs (one for dough and one for egg wash) 4 tsp. vanilla extract 3 ¾ cups all-purpose flour ¼ tsp. cardamom and zest of an orange or lemon (optional, depending on the jam flavor used) ½ cup turbinado (coarse sugar for sanding) Jam (try marmalade, raspberry, strawberry, peace, and black current) Directions: Preheat oven to 350 degrees
Rose Pistachio Ceili Cake with Raspberries is luscious and a reminder that spring will come again. The recipe was adapted from The Kitchen McCabe web site. It was a perfect cake to serve during tea time at our Irish ceili. Rose Pistachio Ceili Cake with Raspberries Ingredients Cake: 3 1/4 cups cake flour 2 cups unsalted pistachios, finely ground in a food processor 1 Tbs. baking powder 1 tsp. baking soda 1 tsp. salt 1 cup (two sticks) organic unsalted butter, room temperature (or Miyoko’s alternative butter or half and half) 1 ¼ cup granulated sugar 1 ½ Tbs. vanilla extract 1 large egg or two small 1 cup milk ½ cup plain yogurt 3 egg whites ½ tsp. cream of tartar Frosting: 1 cup (two sticks) organic unsalted butter, room temperature (or Miyoko’s alternative butter or half and half) 1 Tbs. vanilla extract ½ cup organic raspberries 3 tsp. Organic Veda 100% Pure Rose Petal Powder (Amazon) 5 cups plus powdered sugar Lots of fresh organic raspberries to pile on top of cake Organic Veda 100% Pure Rose Petals (Amazon) Directions: Cake
Dark chocolate Ceili Cake with Chocolate Fig Ganache is another cake adapted from The Kitchen McCabe web site. Visit this site and be inspired by the photography and recipes. I decided on this cake because everyone loves chocolate and I loved the way it was decorated on The Kitchen McCabe site. I, of course, made alterations and made it my own. Dark Chocolate Ceili Cake with Chocolate Fig Ganache Ingredients Cake: 1 ¾ cup all-purpose flour 1 cup grandulated sugar 2 tsp. baking soda 1 tsp. salt ¾ cup plus 4 Tbs. Dutch Process Cocoa Powder (I use Droste) 1 cup strong coffee, cooled ¾ cup plain yogurt 3 medium eggs ½ cup avocado or sunflower oil ¼ cup milk 3 tsp. vanilla extract Chocolate Fig Ganache: 16 oz. chocolate chips (dark preferred) 1 cup whipping cream (I used the alternative Silk Heavy Shipping Cream – dairy free) ¼ cup fig jam Chocolate Swiss Meringue Buttercream: 3 egg whites ½ cup granulated sugar 1 cup unsalted organic butter, cut into cubes 4 oz. dark chocolate chips melted and cooled slightly Toppings: washed lemon grass leaves (florist); stems wrapped in plastic wrap for extra care washed eucalyptus leaves w/seeds on branches (florist); stems wrapped in plastic wrap for extra care fresh figs, cut in half blackberries pomegranate arils (seeds) thin golden ribbon for bottom Directions: Cake:
Isn’t this grand? I’m telling you right now that it is okay to eat desserts when you’re stressed. And to do so without feeling guilty. How? First of all, eat desserts responsibly. Do not buy a package of Oreos, a pint of Ben & Jerry’s ice cream, or even Justin’s mini bag of peanut butter cups and devour them when you’re stressed. You’ll be eating with nervous energy, remorse, chagrin, and even anger (mostly at yourself). This kind of sugar explosion never fully satisfies. Rather, calm yourself by baking (if you don’t bake and it would cause more stress, call the Cynthia’s Synsational Sensations hotline (only if you live nearby) or go to your nearest bakery for therapy. No crap baked goods, however. Preferably, wholesome, nourishing, fresh, organic desserts. If you read your labels, even the grocery store will provide you with what you need for your emergency. The very best way is to go to the kitchen and with the miracle of your hands and fingers – pour, stir, shake, fold, whip, roll, and place, with the loving touch of your flesh that bespeaks love for yourself and others. This is a remedy for stress. It’s called love baking. Take your time, turn on music, light a candle, and be aware that you can become an enchanter, a wizard, concocting magic that delights the senses and nourishes more than the body. And then use your best dishes to serve yourself and others what you have made (or what you have bought) and eat slowly, tasting each spice, flavor, and sweetness (and please note to lessen the sugar in recipes or use maple syrup…this enables you to taste the harmony of flavors in your dessert). I recently read that silent has the same letters as listen. I think that this is also what is needed when we are stressed and want to eat desserts. Perhaps this comes first… 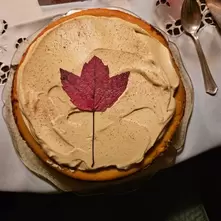 Marvelous Maple Pumpkin Cheesecake Ingredients: Crust, Filling, and Frosting
Instructions l. Crust: Pulse graham crackers and pecans in a food processor into fine crumbs. Add cinnamon and melted butter and pulse until combined. Press mixture onto the bottom and slightly up the sides of an un-greased 9-inch spring form pan. Refrigerate while preparing filling. Preheat the oven to 350 F 2. Filling: Beat the cream cheese in a large mixing bowl on medium speed; add maple syrup and beat for another couple of minutes; stir in pumpkin puree, vanilla, ground cinnamon, nutmeg and salt. Beat until just combined; beat in the eggs one at a time and mix just until combined on low speed (otherwise, too much air can cause a crack in the batter (but ye can cover it with a maple leaf or decoration if it happens). Pour the batter into the prepared crust. 3. Bake for 50-60 minutes, until the edges of the cheesecake are set; the center is lightly wobbly. Cool on a wire rack for 5 minutes. Run a knife carefully around edge of pan to loosen; cool for another hour. Then refrigerate for at least an hour to cool completely (in pan). 4. Frosting: Beat the whipped cream with whisk attachment until hard peaks form; add pumpkin puree and maple syrup and beat until smooth.After cheesecake is completely cooled, remove springform sides of the pan. Spread the frosting evenly and serve, but first put a dried maple leaf in the center…or any other decoration you’d like. This is the best pumpkin cheesecake I’ve ever eaten…and it’s way healthier! 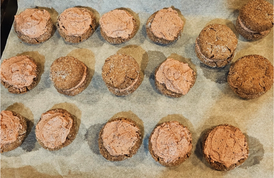 Molasses Espresso Sandwich Cookies with Chocolate Espresso Ganache Ingredients
Instructions:
Mom's Whacky Cake is a recipe in my whisical dessert recipe book with essays and art work, Pavlova in a Hat Box, Sweet Memories & Desserts - for sale on Amazon and other online bookstores. My web site: http://www.cynthianale.com will give you more of an idea about my baking and my historical fiction novels, as well. 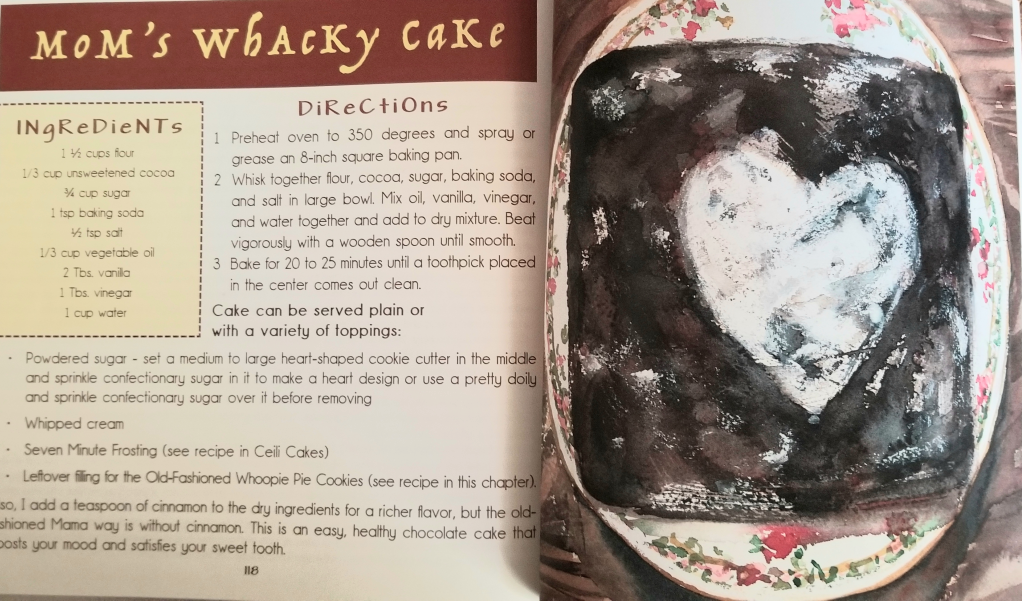
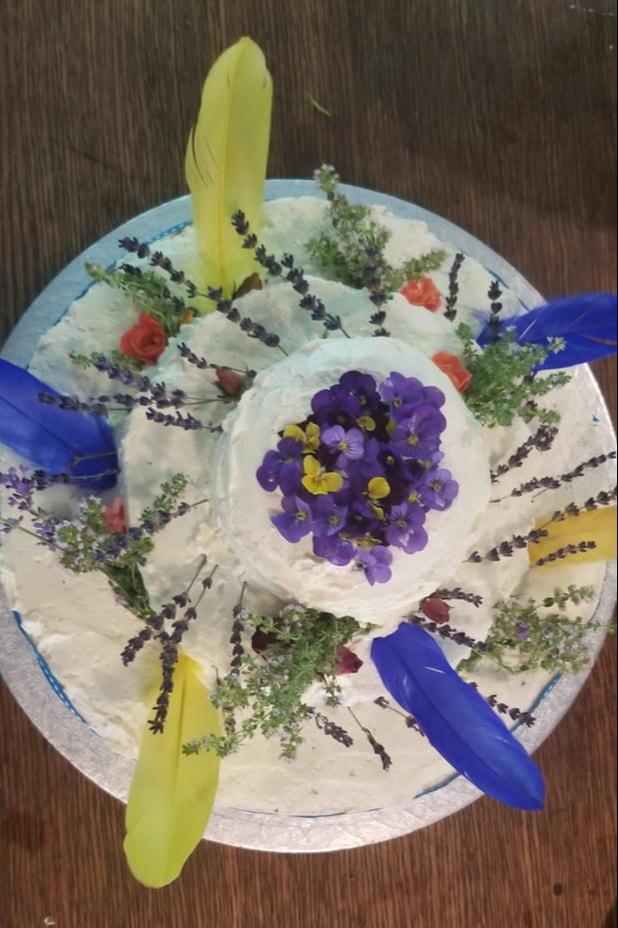
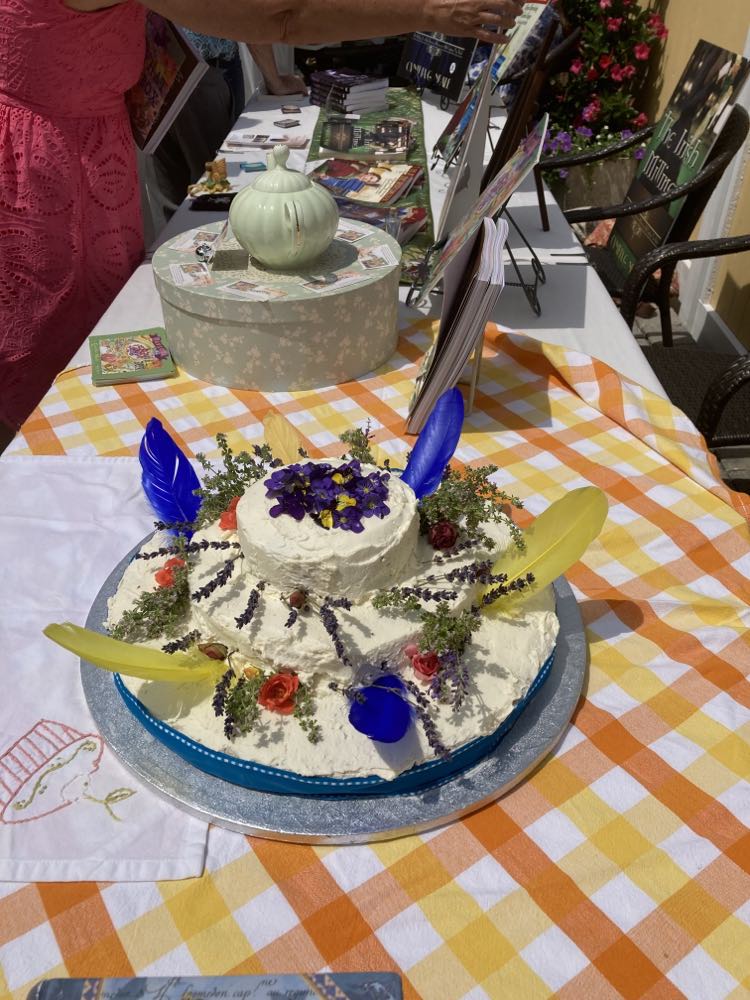
Fine Feathered Lavender Lemon Cake
During the turmoil of the French and Indian War, my real life protagonist, Catharine Montour, takes white captives to bargain with the governor of Pennsylvania. She moves to a renegade Seneca village in what is now Canisteo, New York. There are defected French and British soldiers, runaway slaves, criminals, and Indians from various tribes. It is both rough, diverse, and liberating for Catharine who had always lived peacefully with her famous grandmother and uncle who were cultural diplomats and translators for a few of the colonies. When she saw her fellow Indians dispossessed of their land and dignity, she decided to take a stand. It changes her life to live with her own conscience and to live with so many different people. One of her captives is Elsa, a Swedish woman who lost her family in an Indian raid. One evening, Catharine invites a mish-mash of people from the village into her home for supper. She instructs Elsa to make a cake with dried corn flour and dried bilberries, wrap it in leaves, and bake it under live coals. Elsa says she will make a Swedish cake and Catharine commands she makes a cake the Indian way. Later, after an awkward, but interesting, supper, Elsa presents the cake she made the Indian way, with corn flour, dried berries, and ground nuts. She decorates it with small flowers, something Catharine has never done. Everyone enjoys the cake and some of the distrust and animosity dissolves for a spell. Catharine thinks, “Elsa is a good baker and maybe I’ll let her make a Swedish cake soon.” This is what food can do – sustain and bring people into a silent embrace. And corn, a symbol of sustaining life, was used to feed native communities. For my book launch celebration, I didn’t use corn flour in my lavender lemon cake, but I did decorate it with my garden flowers and added six feathers to represent the Six Nations of the Iroquois Confederacy (Haudenosaunee). It was held on the flower bedecked patio of the Ambrose Restaurant at the Inn by the Bandstand in Exeter, New Hampshire, the very inn built by the son of the general who destroyed Catharine’s village in 1779. I invited friends from the many facets of my life who sustain me with their friendships. It was an elegant, historic, and relevant gala. Although I can whip up a cake pretty quickly and have made large cakes and even a wedding cake, making this cake was time consuming and the special frosting was difficult. It took an entire day into the evening to make the cake and frosting…and I couldn’t have done it without my husband, Tim’s help. It was a humid day and I had chosen an Italian Buttercream frosting because it is known to hold up in the heat. The morning of the launch, I carefully put the decorated cake in a box, jacked up the air conditioning and drove forty minutes to the inn. It then went into a refrigerator until setting it out to be admired forty minutes prior to serving. It held up very well! And I brought home leftover pieces that held up perfectly in the heat. The cake recipe, itself, is quite easy. I used liquid egg whites so I didn’t have to throw out the yokes. I didn’t double the recipe. And so I made the recipe five times to fill my pans! Doubling can oftentimes cause the texture to be too dense. Time consuming! When I made the frosting, however, the liquid egg whites didn’t work. I had experimented with the frosting the week before with liquid egg whites and it worked, but not the day before the launch when I made the frosting. Perhaps it was too humid, but after throwing out three batches of frosting because the meringue didn’t stiffen, my husband hurried to the store and brought back fresh organic eggs. We tried it again and this time, with much patience, it worked. And as I said, it’s delicious and it holds up well in heat and humidity. It refrigerated well and I whipped it up the morning of the launch and frosted the cake and decorated it with flowers and feathers. Lavender Lemon Cake (makes a 9-inch triple-layer cake, serving 15 to 18) Ingredients 2 ½ cups and 2 tablespoons cake flour 1 1/2 cups sugar, divided 1 ½ teaspoons baking soda 9 egg whites ¼ teaspoon cream of tartar 1 cup plus 2 tablespoons buttermilk 1/3 cup vegetable oil Juice from one large lemon or two small 1 ½ teaspoon vanilla 4 tablespoons culinary lavender (or unsprayed garden lavender) Italian Buttercream Frosting (yields 7 cups): 1 pound (16 oz.) unsalted butter, cut into small cubes 1 ½ + 1/3 cups granulated sugar, divided ½ cup water 7 large egg whites ¼ teaspoon salt 1 teaspoon pure vanilla Half a jar of lemon curd Instructions:
Italian Buttercream Recipe Instructions (online – the spruceEats)
NOTE: The recipe gives a raw egg warning, but I feel that the boiled syrup incorporates quickly into the egg whites and cooks them. They advise using pasteurized egg whites (Pete and Gerry’s has them, but they didn’t work for me) You have to decide what is best…no-one got sick at my celebration. Tips: If buttercream looks like soup, either the meringue was too warm before adding in the butter or it needs to be whipped longer. If that doesn’t work, try putting the whole bowl in the fridge for 15 minutes to chill, and then scrape down and whip again. If buttercream looks like chunks of butter, ingredients were too cold; let it come to room temp and try whipping again. Yikes! Take many deep breaths, slow down, be present, and this frosting is worth it! You can leave the lemon curd out if you just want the Italian Buttercream Frosting with vanilla… It was perfectly delicious and could be a wonderful wedding cake! 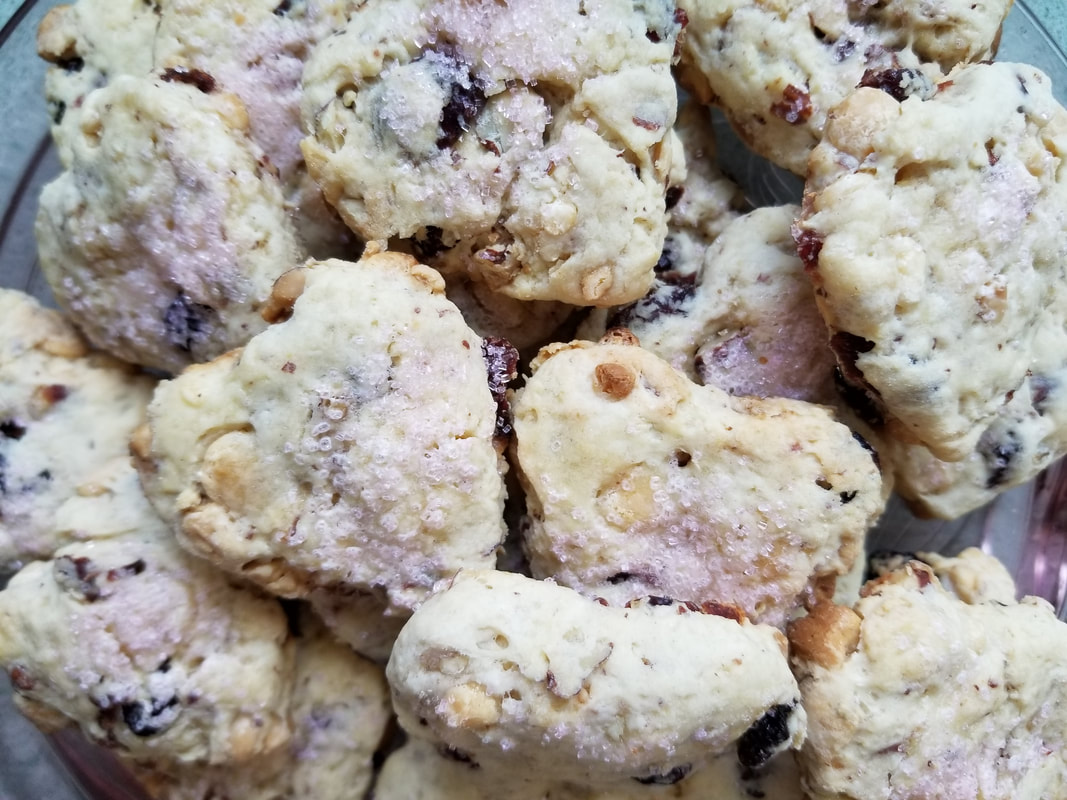 I loved writing my cookbook, Pavlova in a Hat Box, Sweet Memories & Desserts and I'm currently co-authoring another cookbook with the working title, Transatlantic Tarts, Wee Tales & Recipes by Two Celtic Cake Queens. I've been creating new recipes and revising old ones. Below, I share a recipe I've altered and re-named, Sconookies! They are a lovely cross between a scone and a cookie. I often find heart shapes in nature, especially when I need a boost of magic to remind me that I'm loved. I've collected heart-shaped stones, sea glass, and taken photos of mossy heart shapes on tree trunks. Sometimes I've looked up instead of down and the clouds have been heart-shaped. And because love is the most important ingredient I bake with, I adore creating heart-shaped cookies, cheesecake, and scones for Valentine's Day. I don't just bake these heart-shaped delectable sweets for Valentine's Day, but on any day I feel extra loving when I bake. A chuisle mo chroi in Gaelic means my heart's beloved and my husband, Tim, and I have been married close to thirty-five years. We purposely married in February close to Valentine's Day. He's my heart's beloved! And as a writer, he's my first reader. As a baker, he's my first taster. Sconookies Ingredients:
Directions
“Stay me with flagons, comfort me with apples: for I am sick of love.” (Song of Songs) Is it possible, in flickering sensational moments, to time travel? I was at Applecrest Farm in North Hampton, New Hampshire and came upon crates of heirloom apples and one in particular was full of small, delicate, and picturesque apples. I swooned and instantly closed my eyes. I imagined myself wearing an open high-necked chemise with red sleeves tied on with ribbon points and a broad-brimmed hat with plumes. I stood in the Gardens of Versailles with formal gardens flourishing, ornamental trees, and pomme d'api trees laden with Lady Apples. The Lady Apple is the oldest apple that is still being grown today (not to be confused with the Pink Lady Apple, which is full size). The Lady Apple was first documented during the French Renaissance and was the favorite of Louis XIV. It was hardy and flavorful, and was very popular with the Renaissance ladies who would keep one tucked away in their bosom and taken out to freshen their breath. Also known as the Christmas Apple, it was used for decorations. It has yellow-green skin and a pink blush and when I opened my eyes to return to reality, I was blushing with excitement. I had to buy some just to set on my counter in a pretty bowl and perhaps to bake with. The flavor of a Lady Apple is sweet-tart with a succulent and subtle finish. Although French ladies sweetened their bosoms and breaths on these apples, most people today would not consider them as an eating apple with culinary virtues as other apple varieities. And they have the misfortune of being confused with the crab apple. I then saw a crate of Calville Blanc d’Hiver apples and although I didn't swoon, I was enamored with these normal sized apples. These are also French apples dating back to the late 1500s. They are more lemony pear-like in taste and I learned that they are considered the best to cook with because of their texture and flavor. The shape of this apple is unique because of ridges that are said to resemble a crown. I bought a few of these apples, as well, but it was the Lady Apple that I was especially taken with. Later on in the week, I ate a couple of Lady Apples, but kept the rest to display in a pink Depression-glass bowl. Each time I looked at them, I smiled. They made me feel lighthearted! The Calville Blanc apples went into my produce basket with the bananas and squash, but I knew they would soon be eaten in some form. In my book, Pavlova in a Hat Box, Sweet Memories & Desserts, I speak of baking as a Muse and when I take a break from research and writing, I go to the kitchen and stir up stories. "The ingredients in a story and a recipe can create a tantalizing conclusion...It is in my kitchen where I face the empty pages of the stories in my head and fill the empty tins, pans, and cookie sheets with delicious possibility." And when the light grew dim and comfort waned from too much hard work, I remembered my apples and went to my kitchen. I made a French Apple Tart with my Lady Apples and Calville Blanc d'Hiver apples. I used the recipe in Pavlova in a Hat Box for the Rustic Pear Tart, eliminating the mascarpone and adding cinnamon to the spices. I also made an all butter crust with the European-style Plugra butter. I sliced and piled the Calville apples in layered circles and sliced the wee Lady Apples and piled them in the center of the tart. Ooh La La! Scrumptious! I was comforted with a Lady Apple Tart! 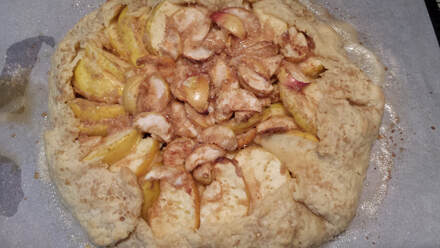 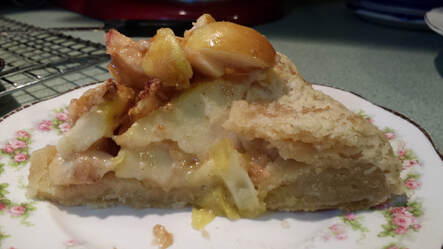 Directions:
Pie Crust:
Filling:
Alter the following directions accordingly 1. Whisk together flour, sugar, and salt. Add shortening and using two forks or a pastry blender, mix into coarse crumbs. 2. Mix vinegar, water, and egg in a small bowl and add to flour mixture. 3. On a lightly floured surface, roll out dough into a circle, approximately 12 to 14 inches diameter; place on large parchment paper lined cooking sheet 4. Preheat oven to 400. 5. Quarter pears, remove cores, and slice into 1/2-inch slices.
It is easy to halve the potato (scone) where there is love ~ Irish Proverb I don’t eat scones here in the U.S. but my own. I’m a scone snob. I’ve created my own version of a scone, my American scone, and it is a cross between the Irish traditional scone and a cookie. In fact, I have two types of scones – Norah’s Dancing Dream Scones and Cynthia’s Cynsational Scones. Both of these scone recipes are included in my new dessert cookbook titled, Pavlova in a Hat Box, Sweet Memories & Desserts. These scone recipes are held in high esteem by all those who partake of them! That said, when I visit Ireland, I eat scones everywhere I ramble and eat them with lots of butter and jam or clotted cream and jam. I’m a coffee drinker more than a tea drinker, but when I eat scones, I must have good strong Irish tea to go along with them. On my recent visit to Ireland, I ate my share of scones in County Clare, County Kerry, and County Cork in cafes and tea rooms. There’s something really liberating devouring Irish scones with tea and friends in Ireland. They usually are eaten after a night of vigorous dancing or after a day of hiking. Every bite brings clarity and joy, and the conversation becomes lighthearted amongst friends. One of the scones I ate was at the café at Moll’s Gap in County Kerry and it is a traditional white scone recipe that is from the Avoca Café Cookbook: Ingredients
To make: Sift the flour, baking powder and salt into a bowl and stir in the sugar. Using your fingertips, lightly work in the butter until the mixture resembles breadcrumbs. At this point, you can add the raisins if you choose to include them. Add the egg, cream and enough milk to moisten. Mix well until it has a soft doughy texture – but it shouldn’t be too moist. Gather the dough into a ball and turn it out onto a floured surface, then roll lightly with a rolling pin to 1 inch/2.5cm thick. Cut out with a round cutter, transfer to a greased baking sheet and brush the tops with the egg glaze. Bake in the oven preheated to 350F/180c/Gas mark 4 for 15-20 minutes or until well browned. I ate a double sized one and didn’t share, as in the proverb says. It was delicious! A week later, while in County Clare with a friend, I went to Nuala’s large farm kitchen near Knockcanes and made my American scones for the sixth annual redhead conference in Crosshaven, Cork. I was going to sell my books, including Pavlova in a Hat Box and I wanted to lure customers to my table with my scones. As soon as I entered Nuala’s kitchen, I was greeted with a loving hug and a big plate of her traditional Irish scones. I think of Nuala as the quintessential Irish hospitality woman multiplied by ten! She always feeds and nourishes us with her excellent food and generous spirit. I wish I could bottle up this warmth emanating from Nuala’s country kitchen and take it home with me! No offense to the delicious Avoca scone and others I had eaten around Ireland, but Nuala’s was the absolute best and the most satisfying and tasty. I can’t give you her recipe here because I don’t think Nuala has it written down. She makes these scones nearly every day and the recipe is inscribed on her heart more than in her head. Every bite with butter and jam made me feel as if all was right in my life and everything would be grand thereafter. 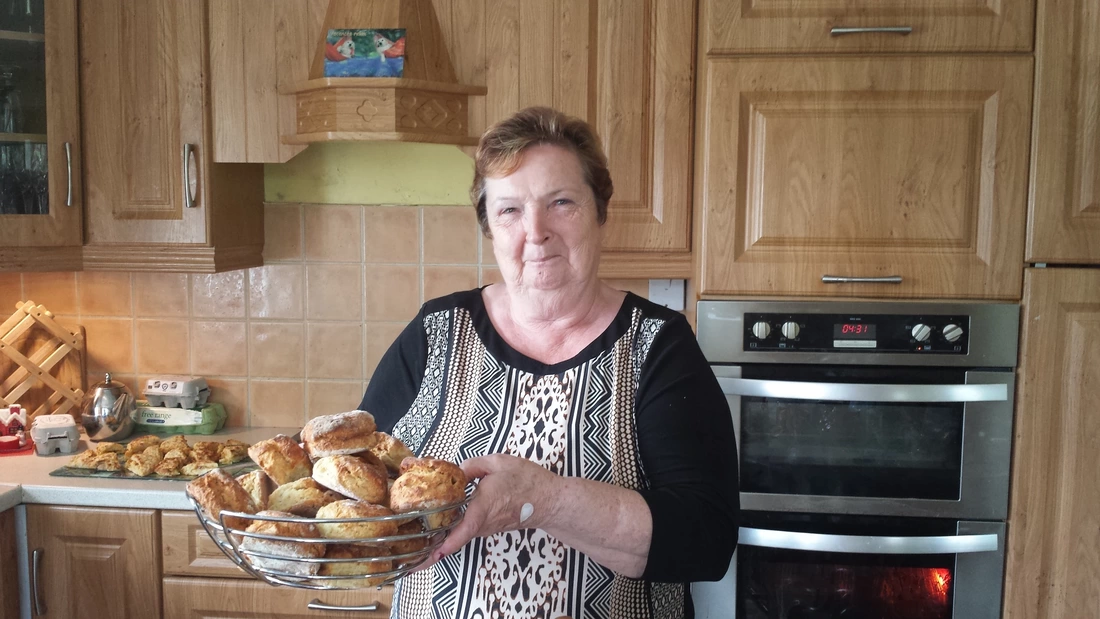 After eating Nuala’s scones, I wondered whether mine would hold a candle to her scones! But there was no competition here, for it was merely a sharing of our love of baking and Nuala’s insistence we needed sustenance before our baking marathon. Martha and Nora, my dancing and long time good friends, assisted me in the making of these scones, and Nuala was at the ready with pans, a hot oven, and her help. Of course, we had to test them to make sure they were festival ready and I was delighted that the good Irish butter and buttermilk I used had made them as tantalizing as I had hoped. And what pleased me most of all was that Nuala gave her, “They’re gorgeous, my dear!” approval. 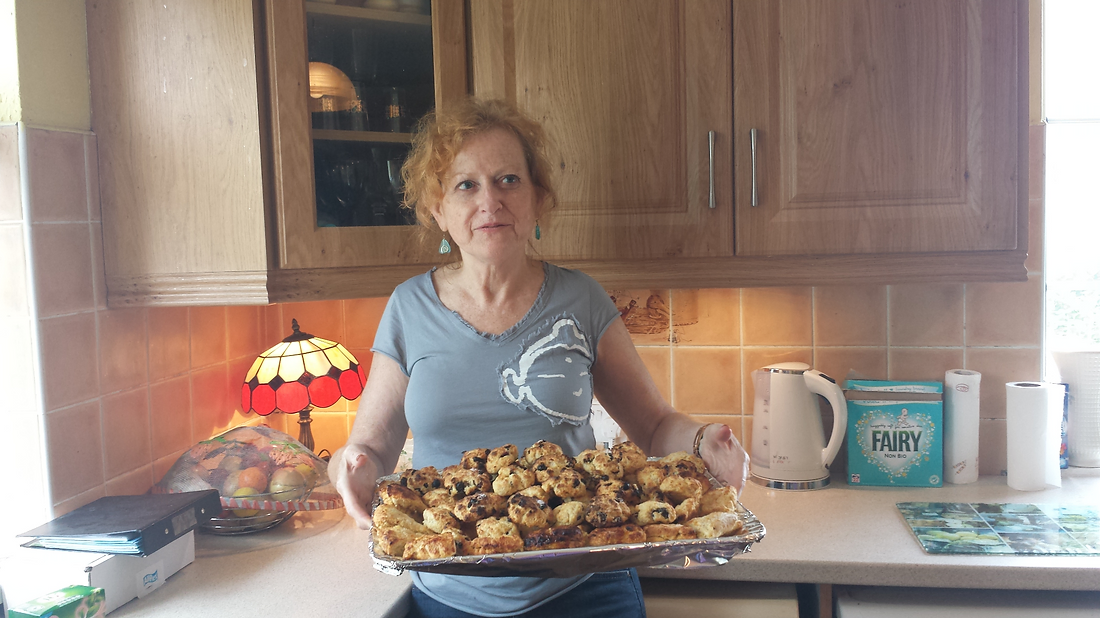 This recent visit to Ireland filled me with so many memories, including getting sconed in Ireland, and I will never forget this treasured time in Nuala’s Country Kitchen making my scones for the redhead conference, which by the way, did bring customers to my table who also said, “these scones are brilliant!” 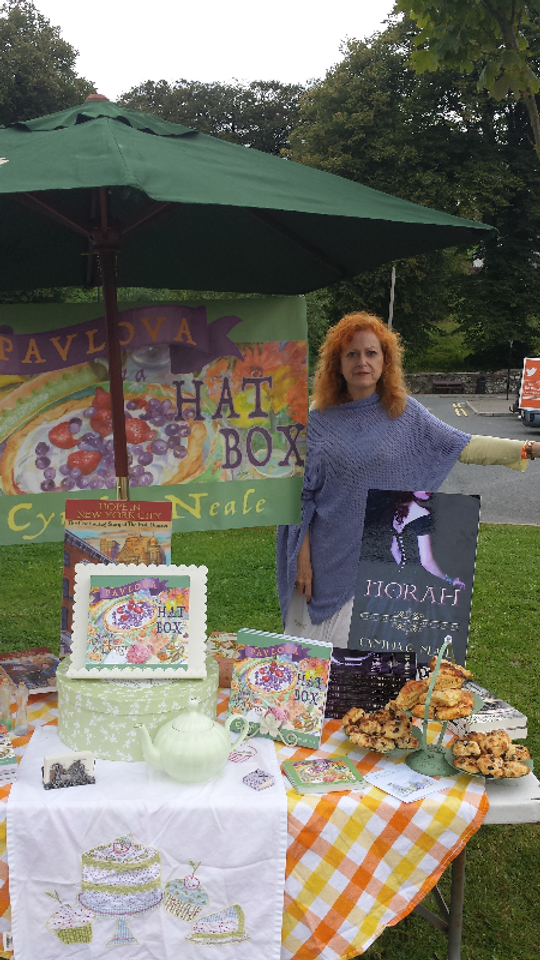 Cynthia’s Cynsational Scones (Cherry-Lemon) Ingredients:
|
Early BlogCynthia's earlier blog posts are still alive and well at Tell It Slant Archives
January 2024
Categories
All
|
 RSS Feed